Hotend & Nozzle Replacement
Model-specific guides for replacing your complete hotend assembly.
How do I replace the hotend on my Bambu printer?
Unload filament, let the hotend cool to 50°C or lower and power off. On X1C, P1S and P1P: unplug the heater, fan and thermistor cables and remove two screws with an H2.0 hex key. The A1 and A1 Mini use a tool-free buckle, the P2S, X2D, H2D and H2S a tool-free clip. If the nozzle size or material changed, update the nozzle information on the printer screen, then run a full calibration.
What you need
- IdeaFormer 0.4mm Hardened Steel Nozzles 5-Pack (A1/A1 Mini): Hardened steel spares for the A1 and A1 mini, which abrasive CF/GF filaments require. View on Amazon
- E3D ObXidian 0.6mm High Flow (P1P/P1S): A complete hardened 0.6 mm high-flow hotend for the P1P and P1S, made for abrasive CF/GF filaments. View on Amazon
- Brass Brush Set: Cleans the nozzle exterior while it is hot; use brass, never steel. View on Amazon
Affiliate links. We may earn a commission at no extra cost to you.
Bambu uses complete hotend assemblies, nozzle, heater, thermistor, and heat break as one unit. Mount type differs by model.
| Printer | Mount type | Tool needed |
|---|---|---|
| X1 Carbon / P1S / P1P | Two screws + three cable plugs | H2.0 hex key |
| A1 | Tool-free buckle | None (tool-free) |
| A1 Mini | Tool-free buckle | None (tool-free) |
| P2S / H2S | Tool-free clip, one hotend | None (tool-free) |
| X2D / H2D | Tool-free clip, two hotends behind a flow blocker | None (tool-free) |
| Type | Sizes | Best for |
|---|---|---|
| Stainless steel (standard) | 0.4mm | PLA, PETG, TPU, ABS |
| Hardened steel | 0.4, 0.6, 0.8mm | CF, GF, abrasive filaments |
| 0.6mm nozzle | 0.6mm | Faster prints, functional parts |
| 0.8mm nozzle | 0.8mm | Draft prints, large objects |
| 0.2mm nozzle | 0.2mm | Ultra-fine detail, miniatures |
- Inconsistent extrusion: Lines varying in width despite good calibration
- Visible nozzle wear: Tip is scratched, flattened, or has visible grooves
- After abrasive filaments: Carbon fiber (CF), glass fiber (GF), and glow-in-the-dark materials wear stainless steel nozzles quickly; Bambu requires hardened steel for them
- Persistent clogs: After cold pulls fail to clear the blockage
- Switching nozzle sizes: 0.4mm to 0.6mm or 0.8mm for different print requirements
- Unload the filament via the printer's filament menu.
- Let the nozzle cool to 50°C or lower, then power off the printer.
- Remove the toolhead front cover (magnetic on the X1; on the P1 disconnect the front-cover fan cable first).
- Unplug the ceramic heater, hotend fan and thermistor cables. On the X1/X1C, press the latch on the thermistor plug before pulling it.
- Remove the two screws near the top of the heatsink with an H2.0 hex key and take the hotend out.
- Fit the new hotend, tighten both screws evenly without overtightening, reconnect thermistor, fan and heater, refit the cover.
- If the nozzle diameter or material changed, update the nozzle information on the printer screen.
- Power on and run the calibration.
- Power off and let the nozzle cool. Press the filament lever on the right side and cut the filament.
- Pull the front cover off from its bottom front right corner and remove the silicone sock.
- Push the nozzle buckle to the right to unlock it, then swing its left side outward
- Hold the heatsink and pull the hotend out
- Insert the new hotend tilted slightly toward the back; the magnet aligns it. Press the heatsink until it sits flush against the heating assembly.
- Close the buckle: flip the left side in first, then lock the right side. If it will not lock, the hotend is not seated flat.
- Refit the silicone sock and press the bottom corners of the front cover until it clicks into place.
- If the nozzle diameter or material changed, update it on the printer under Settings → Maintenance → Nozzle before printing.
- Run calibration after replacement
The newer Bambu printers hold the hotend with a two-part clip instead of screws, and the cables stay on the toolhead. Bambu sells hotends for them in 0.2, 0.4, 0.6 and 0.8 mm, plus a hardened-steel High Flow hotend in 0.4, 0.6 and 0.8 mm that fits all four (and the H2C).
- Power off and let the hotend cool to room temperature. H2D: first lower the bed all the way (Controls → Motion), then power off and lift off the top glass cover. If filament is still loaded (H2D, H2S), press the filament cutter so the hotend can come out.
- Open the toolhead front cover: on the P2S hang it on the toolhead, on the X2D disconnect its cables and take it off, on the H2S press its bottom and pull it forward, on the H2D pinch the two top corners and lift.
- Grip the silicone sock on both sides and pull it down and toward the front.
- X2D and H2D only: move the flow blocker away from the hotend you want to remove with the lifting rod (push it to the right to free the left hotend). Never push the blocker itself; Bambu warns it breaks easily.
- Unlock the clip (P2S: right side first, then the left metal plate) and pull the hotend out by its heatsink. If residue holds it, warm it slightly (Bambu gives 50–80 °C for the X2D), wear heat-resistant gloves and pry gently with tweezers or a screwdriver. Cut off any filament sticking out of the top of the old hotend.
- Open the clip fully, seat the new hotend flat against the heating assembly, close the left metal plate first and then press the right ring. On the H2D, align the left latch completely before you press the right clip; pressing both at once jams the latch inside the clip.
- Slide the silicone sock on from the bottom up so it sits straight and does not touch the plastic around it. Replace the sock when it no longer stays on or the nozzle temperature stops holding steady. Close the front cover.
- Pull gently on the hotend: it must not wiggle. If the diameter or material changed, update the nozzle information on the printer screen (P2S: Filament → Nozzle & Extruder → Nozzle Type). Current Bambu Studio versions show the nozzle on the Printer Parts page as read-only for the H2D and X2D, so the printer screen is the only place to change it.
- Update nozzle diameter and material on the printer screen if they changed
- Auto bed leveling (the new hotend will have a slightly different effective length)
- First layer inspection print to verify Z-offset
- Flow calibration if you switched nozzle sizes
Print a small test object first before committing to a long print. Hotend connections occasionally need reseating if the first few prints show extrusion inconsistencies.
Sources: Bambu Lab Wiki, Hotend Replacement Guide for the P2S (updated 2026-08-20) · Hotend and Silicone Sock Replacement guide for the X2D (2026-05-19) · Replace H2D Hotend (2026-03-27) · Replace H2S Silicone Sock for Hotend and Hotend (2025-08-26) · Replace the Hotend (X1/P1) · Hotend Replacement for A1 Series · Bambu Lab US Store, High Flow Hotend H2/P2S/X2D (checked 2026-10-03)
| Material | Wears stainless steel? |
|---|---|
| PLA, PETG, ABS | No, standard OK |
| TPU | No, standard OK |
| Glow-in-dark | Yes, get hardened |
| Carbon fiber fills | Yes, get hardened |
| Glass fiber fills | Yes, get hardened |
| Metal fills | Yes, get hardened |
Let the hotend cool to 50°C or lower and power off before handling.
Bambu original or compatible hardened steel for abrasive filaments.
Our PicksNeed gear? Our tested picks · All accessories
Tools for this job
Everything you need for a clean hotend swap.
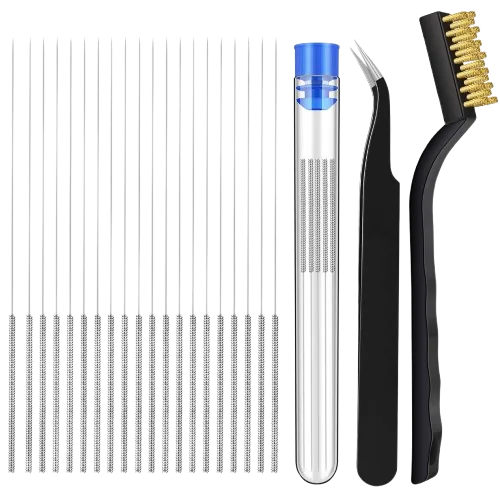
Try a needle and cold pull first: many suspected dead nozzles are just clogged, which this kit clears in minutes.
Amazon →
Hardened 0.6mm high-flow replacement for the P1P and P1S. Handles the abrasive CF/GF filaments that wear out stock steel.
Amazon →Hardened steel 0.4mm nozzles for the A1 and A1 Mini quick-swap system, so a fresh spare is always on hand.
Amazon →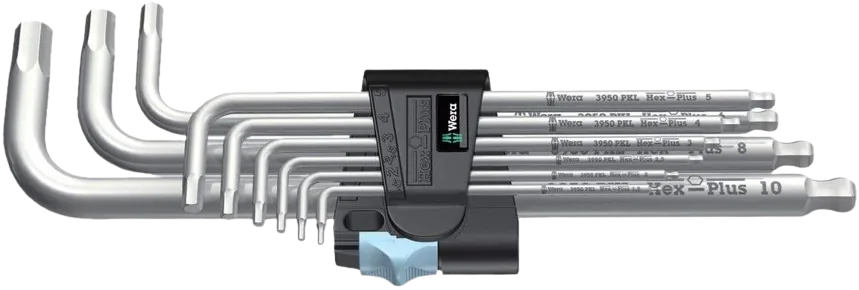
Quality hex keys for the two H2.0 hotend screws on X1/P1 printers; cheap keys strip these small heads fast.
Amazon →Affiliate links. We may earn a small commission at no extra cost to you.